5 Things You Need to Know About Repairing Your Car’s Leather Seats
Your car’s leather seats are one of its most important features – and one of the most expensive to replace. That’s why it’s so important to know how to repair them properly if they become damaged.
Here are five things you need to know about repairing your car’s leather seats:
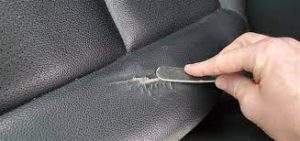
1. The first step is to identify the type of damage. Is it a scratch, a tear, or a burn? Each type of damage requires a different repair method.
2. You’ll need different materials depending on the type of damage. For example, you’ll need leather patches for tears and sandpaper for scratches.
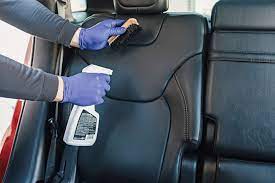
3. It’s important to clean the area around the damage before beginning any repairs. This will help ensure that the repair adheres properly and looks as seamless as possible.
4. Take your time when repairing the damage. Rush jobs rarely look good, and you don’t want your repairs to be notified every time you get in your car.
5. Finally, make sure to condition the repaired area afterward to help keep the leather healthy and prevent further damage down the road.
do it-yourself leather repair kit
If you’ve got a leather car seat that’s seen better days, you might be considering a do-it-yourself leather repair kit. Here are five things you need to know about repairing your car’s leather seats with a DIY kit:
1. Choose the right kit. There are many different types of DIY leather repair kits on the market, so it’s important to choose one that’s specifically designed for repairing car seats. Otherwise, you run the risk of damaging your seats further.
2. Follow the instructions. This might seem like a no-brainer, but it’s important to read and follow the instructions that come with your kit carefully. Otherwise, you could end up making things worse instead of better.
3. Be patient. Repairing leather is not an instantaneous process, so it’s important to be patient and take your time. Rushing through the repair process will only increase the chances of making mistakes.
4. Don’t expect perfection. Unless you’re a professional Leatherworker, it’s unlikely that your repairs will be absolutely perfect. But as long as they’re structurally sound and look decent, that’s really all that matters.
5. Save your receipts. In case something does go wrong with your repairs, make sure to save your receipts and any warranty information that came with your kit. That way, you can hopefully get a refund or exchange if necessary.
how to repair torn leather chair arm
If your car’s leather seats are starting to show their age, you may be wondering how to repair them. Here are five things you need to know about repairing your car’s leather seats:
1. You’ll need to clean the area around the tear before you start repairs. Use a mild soap and water solution to remove any dirt or debris.
2. Once the area is clean, you can begin repairing the tear. If the tear is small, you can use a leather repair kit to fill in the damaged area.
3. If the tear is larger, you’ll need to patch the area with a piece of new leather. Cut a piece of leather that is slightly larger than the tear and glue it in place.
4. Once the patch is in place, you’ll need to blend it into the surrounding area. Use a leather dye that matches the color of your car’s seats and apply it to the patch and around the edges of the tear.
5. Allow the dye to dry completely before using the seat. You may need to apply multiple coats of dye to get a perfect match.